To install a new faucet, begin by confirming compatibility with the sink and supply lines. Gather the necessary tools and safety gear, then shut off the water supply and relieve pressure. Remove the old faucet by disconnecting lines and loosening mounting nuts with a basin wrench. Clean the area, align the new faucet, and seat the gasket evenly. Tighten all connections, test for leaks, and note any adjustments needed as the process proceeds. The next step reveals where small details matter most.
Assess Your Faucet Needs and Compatibility
Assessing faucet needs and compatibility begins with identifying the existing setup and project goals. The process outlines essential criteria, including locating current fixtures, determining thread types, and confirming mounting configurations. Practitioners perform assessing water flow assessments and compatibility checks to ensure the chosen faucet fits space, meets pressure expectations, and aligns with functional requirements, minimizing revisions later in the installation workflow.
Gather Tools, Materials, and Safety Steps
To proceed with installation, the practitioner gathers all required tools, materials, and safety steps before beginning work.
A checklist includes adjustable wrench, basin wrench, plumber’s tape, sealant, replacement gasket, towels, and a bucket.
Confirm compatible faucet, valve types, and supply lines.
Plan gasket placement carefully, then perform water pressure testing to ensure leak-free operation and optimal performance.
Remove the Old Faucet and Prep the Sink
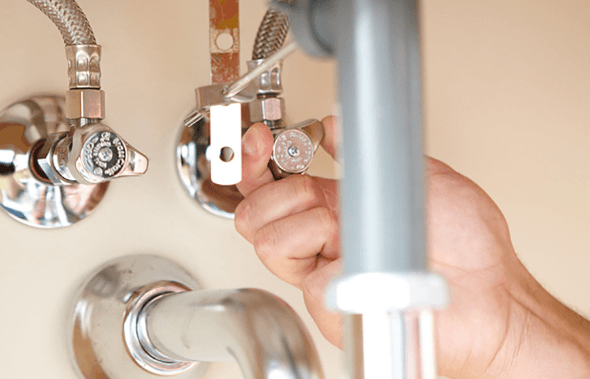
Remove the old faucet by shutting off the water supply and disconnecting the supply lines from the faucet and valves, then remove mounting nuts with a basin wrench or adjustable wrench. With the faucet free, inspect the sink hole and surrounding area. Ideas about Subtopic: “removing faucet, prepping sink” guide practical prep, including cleanup basin and deburring edges, ensuring freedom to install confidently. Disconnect supply.
Install the New Faucet With Proper Seals and Tests
After securing the sink area, the installer aligns the new faucet and begins securing it with the provided mounting hardware, ensuring the gasket or o-ring seats evenly against the underside of the sink.
Once mounted, perform water pressure testing to verify leaks, tighten connections as needed, and inspect product warranties.
Document findings, noting any warranty terms relevant to installation and fixtures.
See also: Space Technology Expanding Horizons
Conclusion
The procedure concludes with a secure, leak-checked faucet installation. Following the steps—verify compatibility, shut off water, remove the old fixture, prep the sink, install the new faucet, seal properly, and test—ensures reliability and warranty compliance. Documentation of steps and findings is recommended for future service. Anachronistic touch: a tech-obsessed homeowner notes, “by candlelight, I calibrated the flow rate,” underscoring meticulous, methodical practice in modern times.